“podman is already the newest version”, but I’m still getting “Command ‘podman’ not found”

Problem and solution

Problem: After installing podman, I my sistem can’t find it:

$ podman

Command 'podman' not found, did you mean:

  command 'pod2man' from deb perl (5.30.0-9ubuntu0.2)

Try: sudo apt install <deb name>

Uninstalling and reinstalling podman in a variety of ways didn’t didn’t fix the problem. The output always included a podman is already the newest version statement:

$ sudo apt install podman
[sudo] password for rolfedh:        
Reading package lists... Done
Building dependency tree       
Reading state information... Done
podman is already the newest version (100:3.4.2-1).
0 upgraded, 0 newly installed, 0 to remove and 0 not upgraded.

Solution: Finally, I found one particular way of reinstalling podman that worked:

$ sudo apt-get install podman --reinstall
Reading package lists... Done
Building dependency tree       
Reading state information... Done
0 upgraded, 0 newly installed, 1 reinstalled, 0 to remove and 0 not upgraded.
Need to get 0 B/17.7 MB of archives.
After this operation, 0 B of additional disk space will be used.
(Reading database ... 472048 files and directories currently installed.)
Preparing to unpack .../podman_100%3a3.4.2-1_amd64.deb ...
Unpacking podman (100:3.4.2-1) over (100:3.4.2-1) ...
Setting up podman (100:3.4.2-1) ...
Processing triggers for man-db (2.9.1-1) ...

Now, podman just works. For example:

$ podman
Error: missing command 'podman COMMAND'
Try 'podman --help' for more information.

Side note: Why am I installing podman?

I’m evaluating Nigel Pouton’s “Quick Start Kubernetes” book as a team training tool. Nigel’s great story-telling skills make learning kubernetes fun. He cuts away the fluff and really tells you the important things in a very engaging way.

Although his website offers a variety of purchase options, I’ve had trouble getting or updating to the latest 2022 edition on Amazon Kindle. Therefore, I strongly recommend purchasing the book on Leanpub: https://leanpub.com/quickstartkubernetes (this is not an affiliate link) where you can always get the latest edition.

What’s the difference between Vale Server and Vale CLI?

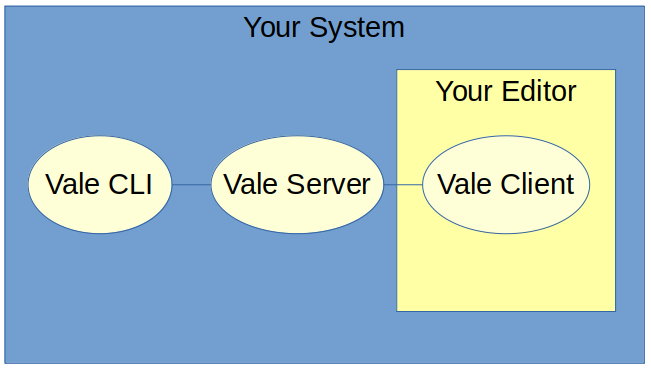
With Vale Server, you can use Vale CLI’s style-checking capabilities in editors such as Visual Studio Code, Atom*, Sublime Text, Google Docs, and Chrome.

On your system, you run Vale CLI and Vale Server. In your editor, you run a Vale client that connects to Vale Server and displays style feedback while you’re editing the content.

For example, without using Vale Server, if you run Vale CLI and use the Google style to check some newsletter content in a markdown file, the output looks like this:

With Vale Server, checking the same content in Microsoft Visual Studio Code looks like this:

Hovering my mouse pointer over line 8 displays the same warning message about sentence-style capitalization. Unlike the CLI, this message in the editor gives me a link to docs for the Google.Headings style rule. And if the issue has an automatic “quick fix”, I can click a button to make that change.

In terms of writing and editing, that’s how Vale CLI and Vale Server are different! The other differences have to do with how you configure and administer each one.

Footnote: I haven’t been able to get Atom to work with Vale Server.

Installing Vale CLI

Vale CLI is a style linter you can use to improve your writing style. Here’s a quick oveview: What is the Vale CLI style checker.

After you install Homebrew, which can be a little tricky, you install Vale CLI by running the brew install vale command:

$ brew install vale
==> Downloading https://ghcr.io/v2/homebrew/core/vale/manifests/2.15.5
######################################################################## 100.0%
==> Downloading https://ghcr.io/v2/homebrew/core/vale/blobs/sha256:8b2094cb8521d
==> Downloading from https://pkg-containers.githubusercontent.com/ghcr1/blobs/sh
######################################################################## 100.0%
==> Pouring vale--2.15.5.x86_64_linux.bottle.tar.gz
🍺  /home/linuxbrew/.linuxbrew/Cellar/vale/2.15.5: 5 files, 13.0MB
==> Running `brew cleanup vale`...
Disable this behaviour by setting HOMEBREW_NO_INSTALL_CLEANUP.
Hide these hints with HOMEBREW_NO_ENV_HINTS (see `man brew`).

That’s it! Pretty easy. You’re ready to start using Vale CLI with Markdown or HTML.

You also need to install a parser if you plan to use Vale CLI with the following markup formats:

  • reStructuredText
  • AsciiDoc
  • DITA
  • XML
  • Code

For example, because I use Vale with Asciidoc markup, I install the asciidoctor parser:

$ brew install asciidoctor
[...]
==> Installing dependencies for asciidoctor: libyaml and ruby
[...]
==> Installing asciidoctor
==> Pouring asciidoctor--2.0.17.x86_64_linux.bottle.tar.gz
🍺  /home/linuxbrew/.linuxbrew/Cellar/asciidoctor/2.0.17: 3,059 files, 22.4MB
==> Running `brew cleanup asciidoctor`...

What is the Vale CLI style checker

Vale CLI is a free open-source style linter you can use to improve the quality of your writing. It’s somewhat like (but different from) the grammar and spell-checkers you find in Google Docs, Microsoft Word, or Grammarly.

Unlike those tools, Vale is designed to work with simple text files that contain a variety of common markup formats. These formats, such as HTML, markdown, and asciidoc, are widely used by developers and technical writers to document software.

You can use Vale CLI from the command line to check individual files or whole directories of files.

Vale CLI output on the command line.

You can also use it in editors that have plug-ins for Vale, such as Microsoft Visual Studio Code, Atom, or Sublime Text.

Vale output in Microsoft Visual Studio Code.

In Vale, you can choose to use one or more styles to check your content. A style is a collection of rules that Vale uses. You can download any of the seven officially supported styles, including Microsoft, based on the Microsoft Writing Style Guide, and Google, based on the Google Developer Documentation Style Guide.

You can also get community-maintained styles such as these on GitHub. Most importantly, you can customize the styles you download or create one from scratch. For example, at Red Hat, the technical documentation group I’m part of has created a style called Vale at Red Hat, that contains rules from a variety of style guides our organization uses.

Installing Homebrew on Linux Mint and Ubuntu systems

Homebrew is a command line utility that makes installing software easier because it does a good job of installing any dependencies for you. Unfortunately, users sometimes run into trouble while installing Homebrew. Here, I show you how to perform the “default” installation that Homebrew recommends on the home page of its website.

Open Terminal and confirm that Homebrew is not installed by running the brew --version command. If it isn’t installed, the output returns Command 'brew' not found. For example.

username@laptop:~$ brew --version

Command 'brew' not found.

Visit the Homebrew website, https://brew.sh/, and copy the installation command by clicking the copy icon:

In Terminal, paste the command by pressing the Ctrl+Shift+V keys at the same time. Then, press Enter to run the command.

$ /bin/bash -c "$(curl -fsSL https://raw.githubusercontent.com/Homebrew/install/HEAD/install.sh)"

You must install Git before installing Homebrew. See:
  https://docs.brew.sh/Installation

username@laptop:~$ git

Command 'git' not found, but can be installed with:

sudo apt install git

If your system doesn’t have git, the output prompts you to install it. So you do that.

$ sudo apt install git
[sudo] password for username:        
Reading package lists... Done
Building dependency tree       
[...]
Processing triggers for man-db (2.9.1-1) ...

Note: Whenever prompted, enter y to continue the installation process.

Note: I use [...] to indicate that I’ve omitted many lines of output.

Rerun the command that installs Homebrew. You can get the command back by pressing the up arrow key a couple of times until the command reappears.

$ /bin/bash -c "$(curl -fsSL https://raw.githubusercontent.com/Homebrew/install/HEAD/install.sh)"
[...]

This automated installation process can take several minutes. When it finishes, the installer suggests “next steps” for you to complete the installation:

[...]
==> Next steps:
- Run these two commands in your terminal to add Homebrew to your PATH:
    echo 'eval "$(/home/linuxbrew/.linuxbrew/bin/brew shellenv)"' >> /home/<username>/.profile
    eval "$(/home/linuxbrew/.linuxbrew/bin/brew shellenv)"
- Install Homebrew's dependencies if you have sudo access:
    sudo apt-get install build-essential
  For more information, see:
    https://docs.brew.sh/Homebrew-on-Linux
- We recommend that you install GCC:
    brew install gcc
- Run brew help to get started
- Further documentation:
    https://docs.brew.sh

Copy/paste these next steps to a file in a text editor so that you can paste and run the commands one at a time.

As noted in the “Next steps,” add Homebrew to your PATH:

$ echo 'eval "$(/home/linuxbrew/.linuxbrew/bin/brew shellenv)"' >> /home/<username>/.profile

$ eval "$(/home/linuxbrew/.linuxbrew/bin/brew shellenv)"

As noted in the “Next steps,” if you have sudo access, install Homebrew’s dependencies:

$ sudo apt-get install build-essential
[sudo] password for <username>:        
Reading package lists... Done
[...]

Reload your terminal by closing and reopening the Terminal or by entering:

$ bash --login.

As noted in the “Next steps,” install the gcc compiler, which brew often uses:

$ brew install gcc
[...]

If the preceding brew command produces a Command 'brew' not found message, reboot your Linux system and try it again.

Congratulations! Using brew to install gcc or any other software verifies that brew is correctly installed and works!

Diagrams help your readers understand. Chris Metz gives “A brief demonstration of Mermaid.js”

This episode is a video demo, which you can see here on Spotify or Vimeo.  

Chris Metz is a freelance solutions architect and tech writer with cloud and emerging technologies based in Danville, California, near the San Francisco Bay Area. 

In “A brief demonstration of Mermaid.js,” Chris shows us how to use Mermaid.js to add diagrams to your documentation. 

Chris recently added the Diagram Guide to the Kubernetes.io website, where he is a regular contributor.

To me, this diagrams-as-code has several benefits:

  • It separates the content of the diagrams from how they are presented, which means that all your diagrams have a consistent look.
  • The search results will include your diagrams when you edit and search your docs.
  • Writers and developers can directly create diagrams without using specialized tools or creating asset files that get lost.

Write Open Source podcast: Jim Angel, Infrastructure Cloud Consultant at Google, on how NOT getting a $1/hr raise launched his tech career

In this podcast, I talk with Jim Angel, who volunteers as a Kubernetes Member/Contributor and Cloud-Native Ambassador and leader in the Kubernetes Docs SIG. In this podcast, he describes how he got started in tech, talks about the localization program for Kubernetes docs, and discusses changes in the leadership of the Kubernetes Docs SIG.

You can get the podcast on your favorite podcast listening app or watch the video podcast on Spotify, here:

Diagrams-as-code for Kubernetes.io

Mermaid is a Javascript-based diagramming and charting tool that uses Markdown-inspired text definitions and a renderer to create and modify complex diagrams. The main purpose of Mermaid is to help documentation catch up with development.

https://github.com/mermaid-js/mermaid

In my recent interview with Tim Bannister, Tim encouraged contributors to create more diagrams for the Kubernetes docs based on the new diagram guide that chrismetz09 created in December 2021.

Notably, this guide shows how to code diagrams using mermaid.js in a live editor!

Mermaid lets you create diagrams and visualizations using text and code.

This notion of diagrams-as-code has tremendous appeal for me! To illustrate why, let me tell you a quick story.

A few years back, I enlisted the help of THE primary graphic designer where I worked to create an information-rich diagram for some product documentation. Because of her talent and organization’s size, she was very much in demand. Using specialized tools, she designed a beautiful and informative diagram and exported it to a graphics file, which I published. A few weeks after publication, the software engineering team made a software change, and just like that, the diagram became outdated!

That approach was much better than the ad-hoc approach that had preceded. At least now, our diagrams were expertly designed, correctly branded, and consistent across all our products.

Unfortunately, that new approach could not be scaled up to meet the customer demand for properly-illustrated documentation, which I estimate at a minimum of 5000 new or updated diagrams per year. I arrived at this figure by estimating ten-plus diagrams per product, times fifty-plus products, times ten-plus additions/updates per product per year. (10+ x 50+ x 10+ = 5000+)

With that backdrop, the benefits of having diagrams-as-code seem significant:

  • Unlimited contributors can create and maintain diagrams using free and open-source software.
  • Teams can store and manage the code for diagrams alongside the documentation source.
  • The tooling separates content from presentation to give all diagrams a consistent look and feel.

Moreover, having source code for diagrams makes it is easier to search for specific terms when updating diagrams and conducting peer reviews.

I think it would make sense to give this new approach a try.

Write Open Source podcast with Tim Bannister, CNCF Top Documentarian, on contributing to the Kubernetes.io documentation

To see the video podcast, open this episode in the Spotify app.

To get the podcast on your favorite podcast listening app, visit https://anchor.fm/write-open-source/episodes/Tim-Bannister-on-contributing-to-the-Kubernetes-io-documentation-e1c3pdi

Podcast summary

  • Tim Bannister is a Consultant at The Scale Factory, London, England.
  • Tim is also a technical lead for the Kubernetes’ documentation special interest group (SIG), which looks after the https://kubernetes.io/ website and documentation.
  • Tim briefly describes the role of chairs and technical leads in the governance of the documentation SIG.
    • The docs SIG is a great way for newcomers to become involved with the organization.
    • You can contribute in a variety of ways, such as:
    • Being a new user a super-power because you can see the content with fresh eyes and identify areas to improve.
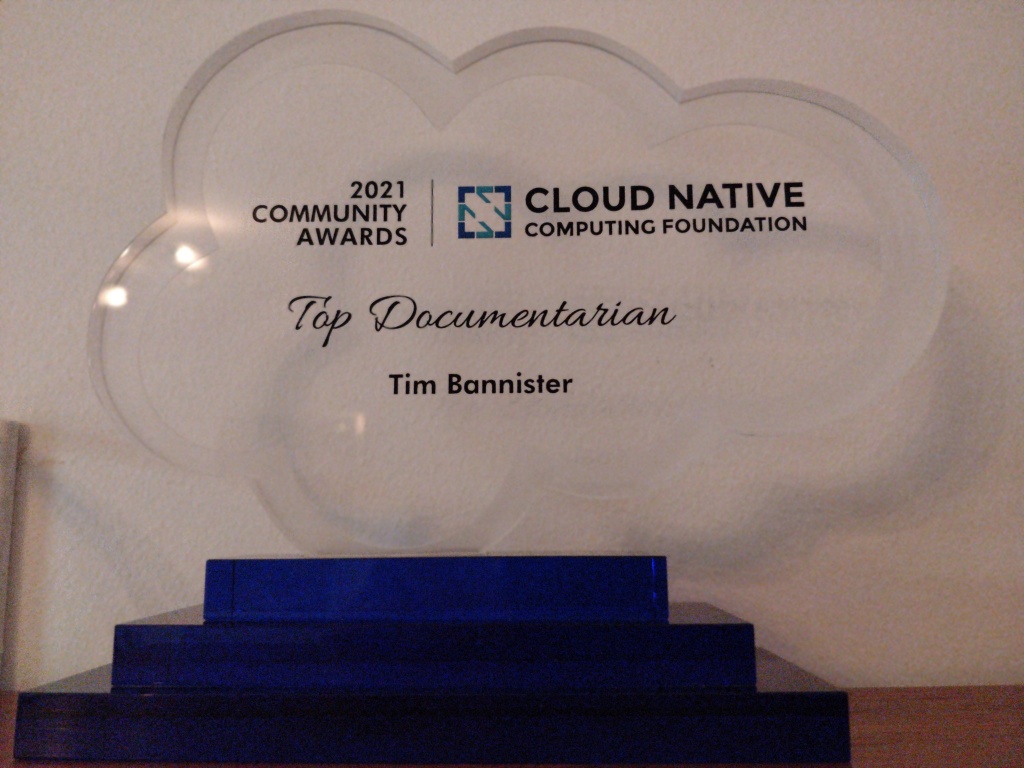
  • The Cloud Native Computing Foundation (CNCF) named Tim as the 2021 Community Award Winner for Top Documentarian!

Top Documentarian: This award recognizes excellence in documentation contributions to CNCF and its projects. Excellent technical documentation is one of the best ways projects can lower the barrier to contribution. CNCF staff selected the Top Documentarian and are happy to present the award to:
Tim Bannister – Tim is a contributor to Kubernetes and other projects and is the technical lead for the documentation SIG, establishing new subprojects, decommissioning existing subprojects, and resolving cross-subproject technical issues and decisions.

https://www.cncf.io/announcements/2021/10/15/cloud-native-computing-foundation-announces-2021-community-awards-winners/